
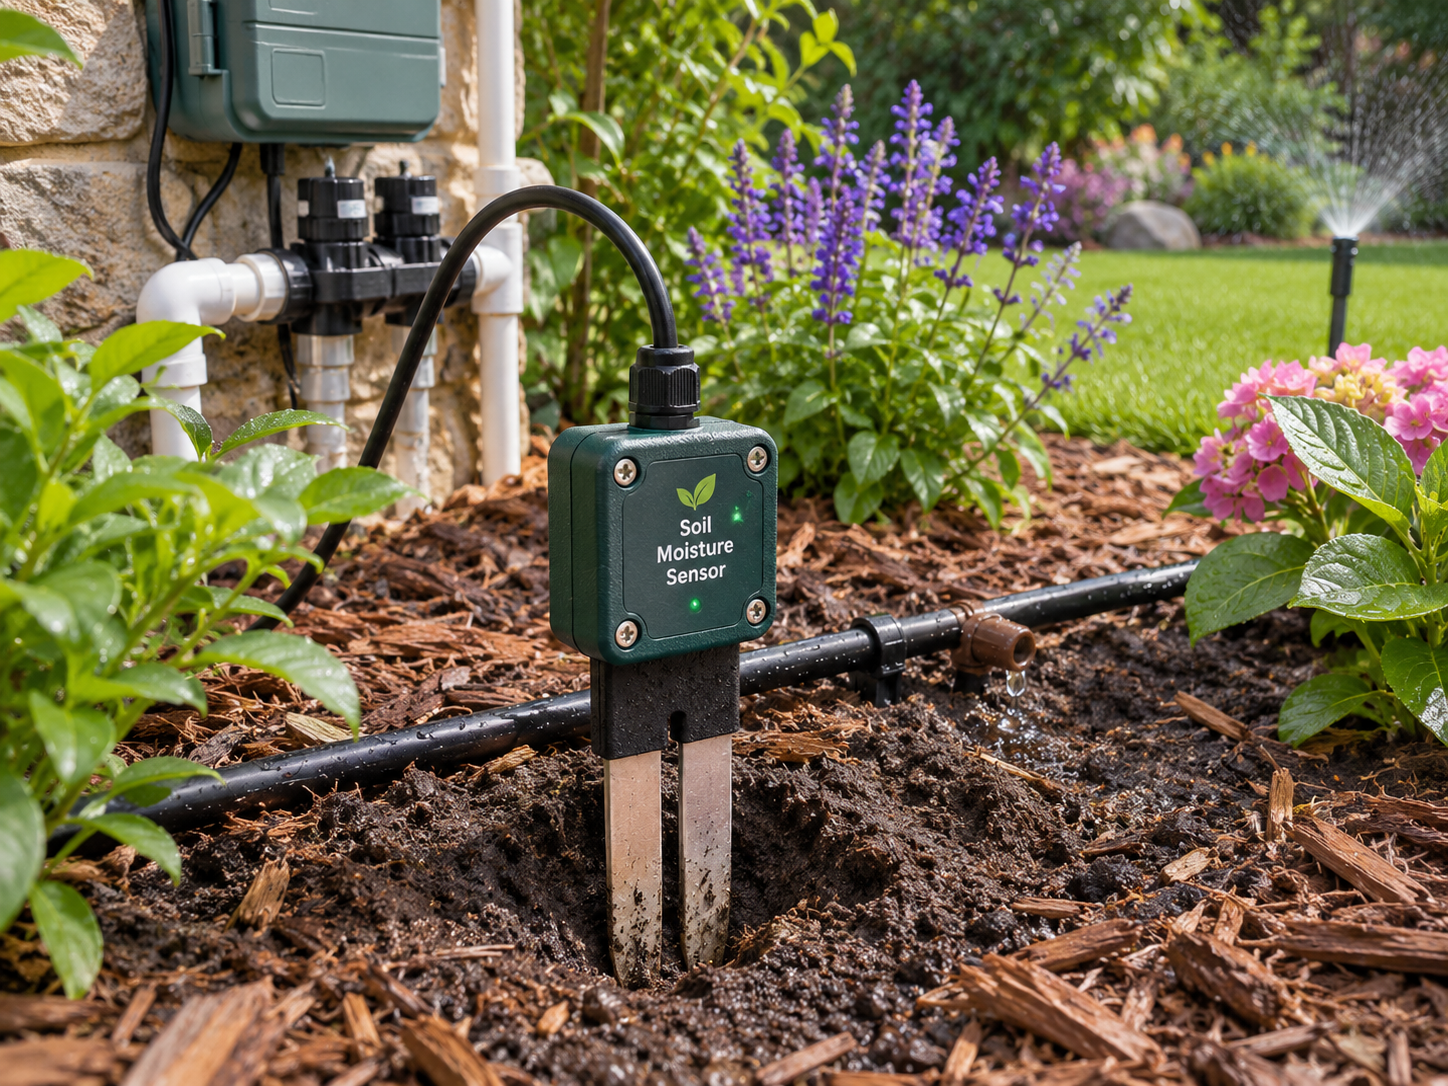
How to Prevent Plumbing Problems When Installing a New Outdoor Irrigation Soil Moisture Sensor
Maintaining the right amount of moisture in lawns, gardens, and landscaped areas is important for healthy plant growth. Too little water can leave plants struggling during hot weather, while excessive watering can create drainage problems, waste water, and contribute to overly saturated soil.
For homeowners in Billings and Laurel, Montana, installing an outdoor irrigation soil moisture sensor can help improve watering efficiency by monitoring conditions beneath the ground. Unlike a traditional irrigation timer that operates according to a fixed schedule, a compatible soil moisture sensor can help determine whether watering is actually necessary.
These sensors can be especially useful for properties with automatic sprinkler systems, drip irrigation, vegetable gardens, and landscaped areas with different watering requirements.
However, improper installation can lead to inaccurate moisture readings, unreliable irrigation schedules, damaged underground wiring, and unnecessary watering. In some situations, these problems can contribute to standing water, excessive runoff, or additional stress on irrigation plumbing.
Understanding how soil moisture sensors work and how to install them properly can help homeowners maintain healthier landscaping while protecting their outdoor water supply systems.
Brown Plumbing & Heating can help homeowners in Billings and Laurel evaluate outdoor plumbing concerns and determine appropriate solutions for irrigation water supply connections.
Why Homeowners Install Irrigation Soil Moisture Sensors
Many residential irrigation systems operate according to schedules programmed into an automatic controller.
For example, a sprinkler system may be programmed to water a lawn several mornings each week.
Although scheduled watering can be convenient, it does not always account for changing soil conditions.
Rainfall, temperature, plant growth, soil composition, and seasonal changes can affect how quickly the ground dries.
An irrigation soil moisture sensor provides information about moisture conditions in the surrounding soil.
Depending on the equipment, this information can be used to delay irrigation when the soil already contains sufficient moisture.
Some controllers use soil moisture measurements to make more detailed watering decisions.
Others simply suspend scheduled watering when a selected moisture threshold is reached.
The exact functionality depends on the sensor and controller.
When properly installed and configured, a soil moisture sensor can help reduce unnecessary watering without requiring homeowners to constantly adjust irrigation schedules.
Understanding How Soil Moisture Sensors Work
A soil moisture sensor measures a property of the soil that is related to its water content.
Different sensor technologies use different methods.
Some sensors estimate moisture by measuring electrical properties that change as soil moisture changes.
Other systems may use specialized probes or additional measurements to evaluate conditions.
The sensor sends information to a compatible irrigation controller or monitoring device.
The controller then interprets the information according to its settings.
For example, a compatible controller may prevent a scheduled watering cycle from beginning when the measured soil moisture exceeds a selected threshold.
When the soil becomes sufficiently dry, the controller may allow irrigation to operate again.
However, the sensor only measures conditions in the soil near its installation location.
It does not automatically determine the moisture level of an entire lawn or garden.
Correct placement is therefore essential.
Homeowners should understand the capabilities and limitations of their selected equipment before relying on it for irrigation management.
Choose the Correct Soil Moisture Sensor
Not every soil moisture sensor is suitable for every residential irrigation system.
Some products are designed for use with specific irrigation controllers.
Others operate as independent monitoring devices.
Certain sensors are intended for lawns, while others are designed for gardens, agricultural applications, or specialized growing environments.
Before purchasing equipment, identify the irrigation controller model and determine whether it supports soil moisture monitoring.
The sensor should also be appropriate for the soil conditions and installation depth.
Homeowners should review the manufacturer’s specifications for operating temperature, moisture exposure, wiring, and compatibility.
If the sensor requires a separate receiver or communication module, verify that the necessary equipment is included or available.
Choosing a compatible sensor can help prevent inaccurate readings and unnecessary installation modifications.
Understand the Difference Between Soil Moisture Sensors and Rain Sensors
Soil moisture sensors and rain sensors both help manage irrigation, but they monitor different conditions.
A rain sensor detects precipitation at its installed location.
It can signal a compatible irrigation controller to suspend watering when rainfall reaches a designated threshold.
A soil moisture sensor measures conditions within the soil.
This can provide information about how much moisture remains in the area surrounding the sensor.
For example, a brief rainstorm may activate a rain sensor even if the soil remains relatively dry.
Conversely, soil may remain moist for several days after rainfall has stopped.
A soil moisture sensor can respond to those remaining conditions when properly configured.
However, neither device guarantees ideal watering for every plant.
The effectiveness of each depends on installation, equipment compatibility, and appropriate settings.
Some irrigation systems can use both technologies, depending on controller capabilities.
Select the Best Installation Location
Proper placement is one of the most important parts of installing a soil moisture sensor.
The sensor should be installed in an area that reasonably represents the watering needs of the irrigation zone being monitored.
Avoid placing the sensor in an unusually wet or dry location unless that area is intentionally being monitored separately.
For example, soil near a downspout may receive more water than the rest of a lawn.
A sensor installed in that location could indicate that the ground is sufficiently moist even when other areas require watering.
Similarly, a sensor located beneath a large tree may experience different moisture conditions because of root competition and shade.
Homeowners should consider sunlight exposure, soil composition, slope, and irrigation coverage when choosing a location.
The goal is to obtain readings that help the controller make useful decisions for the intended watering area.
For complicated landscaping arrangements, more than one sensor may be appropriate if the controller supports it.
Consider the Differences Between Soil Types
Soil composition affects how water moves and remains within the ground.
Sandy soil generally allows water to drain relatively quickly.
Clay-heavy soil often retains moisture longer and may drain more slowly.
Loamy soil contains a mixture of particle sizes and can have different moisture characteristics depending on its composition.
These differences matter when installing soil moisture sensors.
A sensor calibrated for one soil condition may not provide the same results in another.
Homeowners in Billings and Laurel may encounter different soil conditions across their properties.
Landscaping work, imported topsoil, and construction activities can also create variations.
Before installing the sensor, consider the soil in the area being monitored.
Some manufacturers provide calibration instructions or specific settings for different soil types.
Following those recommendations can help improve measurement reliability.
Do not assume that the same moisture threshold will work equally well for every landscape.
Install the Sensor at the Appropriate Depth
Installation depth affects which part of the soil the sensor measures.
A sensor positioned too close to the surface may respond quickly to brief rainfall or irrigation events.
However, the deeper soil around plant roots may still require additional moisture.
A sensor installed too deeply may monitor conditions below the primary root zone of certain plants.
The appropriate depth depends on the plant type, soil conditions, sensor design, and manufacturer’s instructions.
Established lawns generally have different root characteristics than trees, shrubs, or vegetable gardens.
Homeowners should choose an installation depth that reflects the intended irrigation application.
Avoid inserting the sensor at an arbitrary depth without considering what it is supposed to measure.
Correct positioning helps the controller make more meaningful watering decisions.
Maintain Proper Contact Between the Sensor and Soil
Many soil moisture sensors require good contact with the surrounding soil to produce reliable measurements.
Air gaps around the sensing surface can affect readings.
During installation, follow the manufacturer’s instructions for preparing the soil and positioning the probe.
Some sensors are designed to be inserted directly into undisturbed soil.
Others may require a specifically prepared installation opening.
Avoid forcing sensitive equipment into rocky ground if doing so could damage the sensor.
The surrounding soil should be in appropriate contact with the sensing surfaces.
However, homeowners should not compact the soil excessively or modify it in ways that interfere with normal drainage.
Proper installation helps the sensor measure surrounding moisture conditions more consistently.
Identify Underground Utilities Before Digging
Installing a soil moisture sensor may require excavation or insertion of a probe below the surface.
Some installations also require underground wiring between the sensor and irrigation controller.
Before digging, homeowners should consider existing utilities.
Underground electrical cables, natural gas lines, irrigation pipes, communication lines, and other infrastructure may be present.
In Montana, homeowners should contact Montana 811 before excavation to request utility marking.
Privately installed lines may require separate locating services.
These can include certain irrigation pipes, landscape lighting cables, and other owner-installed utilities.
Never assume that shallow excavation cannot damage buried infrastructure.
Careful planning helps protect existing systems and reduces the risk of unexpected repairs.
Protect Irrigation Pipes During Installation
Soil moisture sensors are often installed near existing sprinkler or drip irrigation systems.
This means underground water supply piping may be present.
Homeowners should avoid damaging irrigation tubing or fittings when digging.
A small puncture in a buried pipe can create an underground leak.
In some situations, the leak may remain unnoticed until the surrounding soil becomes excessively wet.
Before excavation, review any available irrigation plans or property maintenance records.
Identify nearby sprinkler heads, valve boxes, and visible water connections.
Excavate carefully around suspected piping locations.
If an irrigation line is accidentally damaged, repair it using compatible materials and approved methods before restoring the system to normal operation.
Protecting existing plumbing is just as important as installing the new sensor correctly.
Use Proper Underground Wiring
Some irrigation soil moisture sensors communicate with a controller through buried electrical wiring.
These connections must be suitable for outdoor conditions.
Underground installations may expose wiring to moisture, soil movement, temperature changes, and accidental damage.
Improperly protected connections can corrode or fail.
Homeowners should use wiring and connectors approved for the sensor and installation environment.
Follow the manufacturer’s instructions regarding cable length, wire type, and connection methods.
Avoid using ordinary indoor connectors for buried installations unless they are specifically rated for that purpose.
Wiring should be routed carefully to reduce unnecessary tension and exposure to landscaping equipment.
If a cable passes beneath a walkway or other surface, the installation must account for the applicable protection requirements.
Reliable wiring helps maintain accurate communication between the sensor and controller.
Consider Wireless Soil Moisture Sensors
Wireless soil moisture sensors may provide greater flexibility when running electrical cable would be difficult.
These devices transmit information to a compatible irrigation controller or receiver.
However, wireless operation introduces additional considerations.
Communication range may be affected by distance, structures, landscaping, and other obstacles.
Some devices require batteries that must be inspected or replaced periodically.
Before purchasing a wireless sensor, verify its compatibility with the intended controller.
Review the manufacturer’s recommended communication range and installation requirements.
Avoid assuming that the sensor will work reliably from any location on the property.
After installation, confirm that the controller receives consistent information.
A wireless sensor that frequently loses communication may not provide dependable irrigation control.
Configure the Irrigation Controller Correctly
A soil moisture sensor must be properly configured to influence automatic irrigation.
Some controllers require the sensor to be enabled through their settings.
Others may require specific wiring or additional interface equipment.
The controller may also need a moisture threshold or related operating parameter.
Incorrect settings can cause the irrigation system to water too frequently or not often enough.
Homeowners should follow the manufacturer’s setup instructions.
Verify that the controller recognizes the sensor and responds appropriately to its readings.
Some systems provide moisture information directly on a display or mobile application.
Others simply indicate whether the sensor is allowing or suspending irrigation.
Understanding how the controller interprets the sensor’s information is important for proper operation.
Avoid relying on default settings without confirming that they are suitable for the landscaping.
Calibrate the Sensor for Accurate Readings
Calibration helps ensure that the sensor provides information appropriate for the soil and watering conditions.
Some sensors are factory-calibrated and require little adjustment.
Others allow users to establish moisture thresholds or perform site-specific calibration.
Homeowners should follow the manufacturer’s instructions rather than applying generic calibration methods.
The goal is to establish settings that reflect reasonable moisture conditions for the plants being watered.
Too high a threshold may keep the irrigation system from operating when watering is needed.
Too low a threshold may allow unnecessary watering.
Calibration should also account for the type of irrigation equipment used.
A drip irrigation system may create a different soil moisture pattern than a conventional sprinkler system.
Monitoring the sensor’s readings and observing plant conditions can help determine whether adjustments are necessary.
Understand How Drip Irrigation Affects Moisture Readings
Drip irrigation delivers water to concentrated areas near emitters.
This can create localized moisture patterns beneath the soil.
A sensor installed directly beside an emitter may detect moisture sooner than one positioned farther away.
As a result, sensor placement is particularly important for drip irrigation systems.
If the sensor is placed in an area that receives unusually concentrated watering, it may not represent the conditions experienced by the rest of the garden.
Homeowners should review the irrigation system’s layout before selecting the sensor location.
The manufacturer’s recommendations may provide guidance for drip irrigation applications.
Consider emitter spacing, watering duration, soil composition, and plant root locations.
Proper positioning can help the sensor provide more useful information about the irrigation zone.
Prevent Overwatering and Drainage Problems
Excessive irrigation can create several property maintenance concerns.
Water may accumulate in low areas, saturate garden beds, or create muddy conditions.
Repeated watering near building foundations can also contribute to unwanted moisture.
A properly configured soil moisture sensor may help reduce unnecessary watering when the ground already contains sufficient moisture.
However, the sensor cannot correct every drainage problem.
Poor grading, compacted soil, blocked drainage paths, and malfunctioning sprinkler equipment may still cause standing water.
If an irrigation system creates persistent puddles, homeowners should investigate the underlying cause.
The solution may involve adjusting watering schedules, repairing plumbing components, or improving drainage.
Using soil moisture information alongside regular landscape inspections can help reduce unnecessary water accumulation.
Understand the Sensor’s Limitations
A soil moisture sensor is a monitoring tool, not a complete irrigation protection system.
It measures conditions near its installation location.
It does not automatically identify every underground leak or damaged sprinkler head.
For example, a broken irrigation pipe may allow water to escape in an area away from the sensor.
Depending on the system’s configuration, the sensor may not detect that problem.
A sensor may also provide misleading readings if it becomes displaced, damaged, or surrounded by air gaps.
Incorrect calibration can cause unnecessary watering delays.
Homeowners should continue inspecting irrigation equipment for leaks and performance problems.
Monitoring technology can improve irrigation management, but it should not replace regular maintenance.
Protect the Household Water Supply From Backflow
Adding a soil moisture sensor does not change the need for appropriate backflow prevention.
Outdoor irrigation systems can come into contact with soil, fertilizers, pesticides, and other potential contaminants.
Under certain conditions, water may move backward toward the household potable water supply if adequate protection is not installed.
A soil moisture sensor does not prevent backflow.
It measures soil conditions and communicates with irrigation controls.
The water supply connection must still include appropriate protection based on the system design and applicable plumbing requirements.
Homeowners should not remove or bypass existing backflow prevention equipment when modifying an irrigation system.
If the installation involves new piping or additional irrigation zones, the water supply arrangement should be evaluated.
A qualified plumber can help determine whether the system includes suitable safeguards.
Test the Sensor After Installation
Testing helps confirm that the soil moisture sensor is communicating correctly with the irrigation controller.
After installation, follow the manufacturer’s recommended testing procedure.
Verify that the controller recognizes the sensor.
If the equipment provides moisture readings, check that the information appears reasonable for the surrounding soil conditions.
Some manufacturers provide a test mode or specific steps for confirming sensor operation.
Homeowners should also verify that scheduled irrigation responds according to the configured settings.
Avoid assuming that the sensor is functioning simply because it has been connected.
If the controller does not receive information, inspect the configuration, power supply, and accessible connections according to the manufacturer’s instructions.
Correct any problems before relying on the sensor for regular watering decisions.
Recognize Signs of an Inaccurate Sensor
A malfunctioning soil moisture sensor can affect irrigation scheduling.
One warning sign is a lawn or garden remaining excessively dry even though the controller repeatedly reports sufficient moisture.
Another concern is irrigation continuing frequently despite consistently saturated soil.
However, these symptoms do not automatically mean the sensor has failed.
Incorrect placement, inappropriate calibration, damaged wiring, and controller settings can cause similar problems.
Homeowners should inspect the sensor location and review the equipment’s troubleshooting instructions.
For wireless devices, check communication and battery status when applicable.
If the sensor is physically damaged or no longer produces reliable readings, replacement may be necessary.
Identifying the actual cause can help prevent unnecessary equipment costs.
Prepare the Sensor for Montana Winters
Billings and Laurel experience cold winters that require proper preparation of outdoor irrigation systems.
A soil moisture sensor does not protect water-filled irrigation pipes from freezing.
The irrigation water supply must still be winterized according to the system design.
The sensor itself may also have temperature limitations.
Some models are designed to remain installed underground throughout winter.
Others may require specific maintenance or storage procedures.
Homeowners should review the manufacturer’s recommendations.
For wireless sensors, battery performance may be affected by cold temperatures.
Avoid pulling a buried sensor out of frozen soil if doing so could damage the equipment or wiring.
The correct seasonal procedure depends on the specific product.
Planning for winter helps protect both the monitoring equipment and the connected irrigation system.
Inspect the Sensor Before Spring Startup
Spring is an appropriate time to inspect irrigation monitoring equipment.
Before regular watering begins, verify that the soil moisture sensor remains properly positioned.
Check visible wiring, connectors, and mounting components for damage.
If the sensor includes a wireless transmitter, inspect its power source and communication status.
Review the irrigation controller’s settings.
If the system was modified or reset during winter, sensor configuration may need attention.
Follow the manufacturer’s recommended testing procedure.
Also inspect the irrigation plumbing for leaks or damage before returning the system to regular use.
A properly functioning sensor is most effective when the watering system itself is operating correctly.
Maintain the Sensor Throughout the Growing Season
Routine maintenance helps keep soil moisture monitoring dependable.
Periodically review sensor readings and compare them with observed landscape conditions.
If readings appear inconsistent, investigate the sensor location and configuration.
Check for visible cable damage or disturbed soil around the installation.
Landscaping projects, digging, and soil movement may affect buried equipment.
If plants are replaced or the irrigation zone is redesigned, reconsider whether the sensor remains in a representative location.
A sensor installed for an established lawn may not be ideally positioned after the area is converted into a garden bed.
Homeowners should also review irrigation schedules as seasonal conditions change.
Proper monitoring and maintenance help ensure that the sensor continues supporting the intended watering strategy.
Know When Professional Assistance Is Appropriate
Installing a soil moisture sensor may be straightforward when the existing irrigation controller supports the equipment and the installation does not require plumbing modifications.
However, some systems involve multiple irrigation zones, complicated wiring, underground piping, or specialized monitoring equipment.
Professional assistance may be appropriate when controller compatibility is unclear or the sensor repeatedly produces unreliable results.
If the irrigation system experiences leaking valves, damaged underground piping, or unusual water pressure, a plumbing inspection may also be necessary.
A sensor cannot correct physical problems within the water supply system.
Brown Plumbing & Heating can help homeowners in Billings and Laurel evaluate irrigation plumbing concerns and determine appropriate repair or installation solutions.
Improve Irrigation Efficiency With Proper Soil Moisture Monitoring
An outdoor irrigation soil moisture sensor can be a useful addition to a residential watering system.
By monitoring moisture conditions beneath the ground, a compatible sensor can help homeowners reduce unnecessary watering and make more informed decisions about irrigation schedules.
However, reliable performance depends on selecting appropriate equipment and installing it correctly.
Homeowners should consider sensor compatibility, soil type, installation depth, location, and controller configuration.
Proper underground wiring, accurate calibration, and routine inspections are also important.
For properties in Billings and Laurel, seasonal weather changes make thoughtful irrigation management particularly valuable.
A soil moisture sensor can help manage watering, but it should be used alongside proper plumbing maintenance, backflow protection, and appropriate winterization.
With careful installation and ongoing attention, soil moisture monitoring can support healthier landscaping while helping homeowners manage outdoor water usage more effectively.
For homeowners experiencing irrigation leaks, damaged outdoor connections, unusual water pressure, or other plumbing concerns, Brown Plumbing & Heating can help assess the situation and recommend appropriate solutions.
Read Next: How to Prevent Plumbing Problems When Installing a New Outdoor Irrigation Rain Sensor